Setting Font Attributes Globally Using Style
Sheets
Setting
Font Sizes for Specific Text
User Font Preferences
Resources
Changing Fonts for the Whole Site with Stylesheets
In older versions of Web Crossing it was sometimes necessary to resort to placing <font> tags in the banner and footer of the site to control the font face used. Web Crossing 5.0 has been completely reworked with stylesheets in mind. In the Theme Manager > Edit Theme Settings page you can set a default font face and font size for the entire site, or for the folder you're in. You can set additional global settings in the Control Panel: Customizing > User Pictures and Default Fonts.
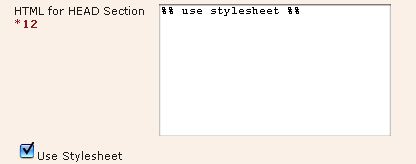
Like all style sheets, these work on 4.0 + browsers which support style sheets. If, for some reason, you decide you don't want the default stylesheet turned on, either because you don't want a stylesheet at all or because you want to write your own, you can turn off the default stylesheet in the Theme Manager > Edit Theme Settings > Global Settings area. Either uncheck the checkbox, or remove the call to %% use stylesheet %% in the HEAD Section textarea just above. If you have Themes on, your own stylesheet can be linked from that same textarea or pasted there so it is appears in the HEAD of the document, as you prefer. If you have Themes off, you can use the same technique, only your stylesheet will need go into the HEAD field in the Control Panel > Banner/footer page instead.
Alternatively, if you want to keep the built-in stylesheet but merely add to it, simply place your stylesheet (or a link to it) below the %% use stylesheet %% call in the either HEAD section textarea, depending on if you have Themes on or off.
Figure 1 - Screenshot of stylesheet section of Global Settings page.

Here is a list of the supported classes in the built-in stylesheet. If you want to know exactly how the stylesheet looks as it's served, or want to know what a particular plugin adds to the stylesheet, you can do a "view source" from your browser, find the stylesheet URL, and then load that in your browser to view it directly.
General Styles
.2 (two px smaller than default)
.text (same as body text)
.size1 (more or less equivalent to font size=1)
.size2 (more or less equivalent to font size=2)
.size3 (more or less equivalent to font size=3)
.size4 (more or less equivalent to font size=4)
.size5 (more or less equivalent to font size=5)
.size6 (more or less equivalent to font size=6)
H3.subtitle
.treeTitle
.pathTitle
.backpath
.nonbold
.red
.alert
.preparedFor

Non-Classic Folder Listings
.flTitle
.flmsgCount
.flNewMsgCount
.flAuthorName
.flDateFormat
.flChatOccupants
.flLinkDescription
.flPathTitle
.flMarkAsRead

Non-Classic Message Listings
.mlMultiSelect
.mlMessageListCount
.mlDeletedMsg
.mlAuthorName
div.mlMsg blockquote
.mlMsgNumber
.mlSecondLine
.mlTreeTitle
.mlAttachments
.mlAttachmentNames
.mlResponseTo
.mlReplies
.mlReplies a
.mlReturn
.mlWasEdited
In addition, divs surround the following elements:
Content cell: <div class="content">
Nav cell: <div class="nav">
Multi-purpose cell: <div class="multi">
Toolbar: <div class="toolbar">
Each message: <div class="mlMsg">
Entire folder list: <div class="fl">
Charsets
If your site is using a language other than English, especially one with an extended character set, you will want to make sure that you set the site monospaced font face to something that can support all the character sets your site supports. This font face is used for all textareas and form fields. The default is Courier, which is fine for English, but may not support the extra characters in your chosen language(s). You can fill in a list of fonts if you like, as you would for a font face tag or a stylesheet font-family definition.
Figure 2 - Screenshot of Monospaced Font Setting.

Changing Font Sizes for Specific Text
You can change the font size of certain displayed text within Web Crossing. In the Control Panel, go to Customizing > User Pictures and Font Sizes.
Here, you can choose the font size for the UserName display, the second line of text, and the size for the body text. If you leave the squares blank, the users' browsers will display the default size (3). Fill in a number from 1 (small) to 6 (big) if you wish to choose a specific size. Click Update Settings to make your changes.
To change the size of the title of the folder or discussion displayed on each page, go in the Control Panel to Customizing > Title, Toolbar, Backpath, and Edit Help Settings.
At the top of the page you'll see the Title settings with the default text filled in already. To change the HTML display of the page title, simply edit the HTML there in the text field and click Update Settings at the very bottom of the page.
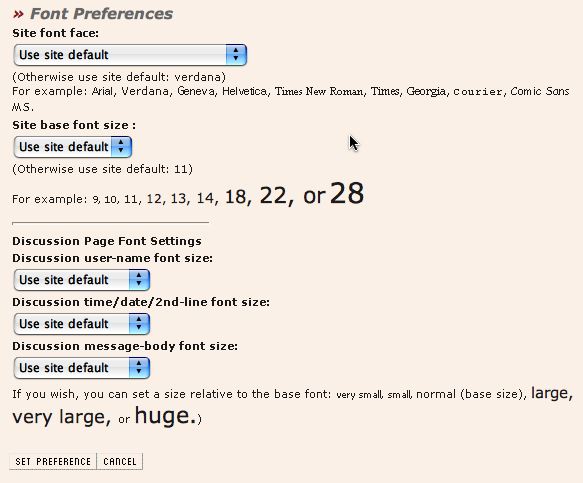
Users now have the ability to choose their own font face to view the site, and a size. They can accept the site defaults or choose a larger or smaller size. In addition, they can choose to accept or override the specific settings for user names, "second lines" and message bodies.
Figure 2 - Screenshot of User Font Settings Page.

See Demystifying Cascading Style Sheets (CSS and WebX).
Web Crossing FAQ: