Connecting
for the First Time
Troubleshooting
Resources
When you connect to your Web Crossing server for the first time (after installation), you will have to go through a one-time-only process of setting up a minimum amount of needed information to run Web Crossing. You can follow along with this section while going through this setup procedure.
In this example, the Server was Mac OS X and the Client was Windows 2000, however the setup is exactly the same for all three platforms (Unix, Windows and Mac OS)
After you finish the installation process, you will need to connect to your Web Crossing server using your favorite browser. The URL for your Web Crossing server depends on your domain name, script name, platform and whether you are running in direct web service mode or cgi mode. Also, if you are running in cgi mode, the URL depends on which external web server you are using.
Here are some examples of the URL you should use for accessing your Web Crossing server. In place of yourdomain.com you would enter your fully-qualified server machine's domain name (example: www.bigcollege.edu, www.webxharbor.com, etc.) and the script name you chose when you installed Web Crossing (typically Web Crossing or Web Crossing).
Direct Service Mode
| Platform |
URL |
| Unix (Linux, Solaris, Mac OS X, FreeBSD, Etc) |
http://yourdomain.com/webx |
| Mac OS |
http://yourdomain.com/webx |
| Windows (NT/98/95/2000) |
http://yourdomain.com/webx |
|
Note: Very often, depending on your platform, you can access right away by just entering the domain name in your browser (without the script name) - for example, just www.bigcollege.edu. |
CGI Mode
| Platform |
URL |
| Unix (Linux, Solaris, Mac OS X, FreeBSD, Etc) |
http://yourdomain.com/cgi-bin/webx |
| Mac OS |
http://yourdomain.com/cgi-bin/webx |
| Windows (NT/98/95) |
http://yourdomain.com/scripts/webx.dll? |
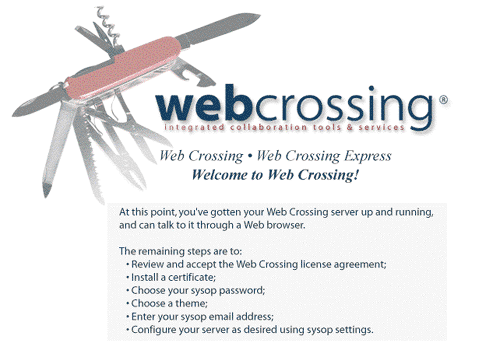
When you successfully connect to your Web Crossing server for the first time in Direct Web Service (DWS) mode, you will be greeted with the welcome page shown in Figure 1. Click the picture, or the OK button below it, to continue.
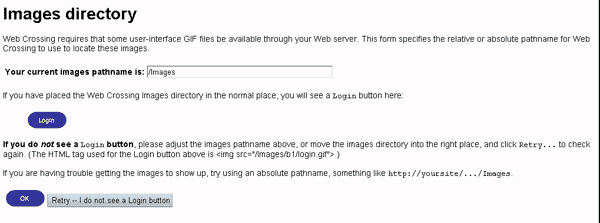
If you have configured for CGI Mode, when you connect for the first time, you will initially see a page to set the path to your Images directory (Figure 2). After that, you'll see the Figure 1 welcome screen.
If you used the installer program for your server, the Images directory should be in the proper place and you should see the Login button. See the Troubleshooting section below if you are having problems with this. Otherwise, click OK to proceed with the setup.
Figure 1 - the first page you see when connecting to a new Web Crossing server for the first time in DWS mode

Figure 2 - the first page you see when connecting to a new Web Crossing server for the first time in CGI Mode
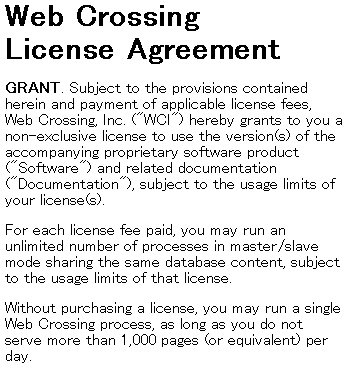
Go on the next page, which is the license agreement, shown in figure 2.
Figure 2 - the Web Crossing license agreement page is shown to you during setup
For details about the different licenses available, and a full description about how page views are counted, see the Licensing Section. After agreeing to the licensing terms, you will proceed to install a license certificate, as shown in figure 3.
Figure 3 - the license certificate page
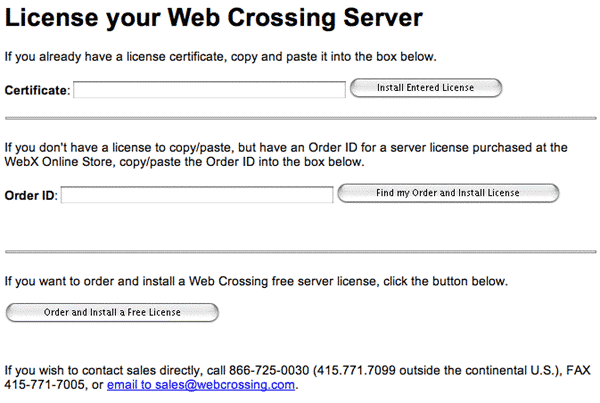
After agreeing to the licensing terms, you'll install your license by pasting it into the textbox (figure 4), entering an order ID, or heading to the Store for a Web Crossing Express (free) license.
Figure 4 - entering a license certificate

After installing a license, you will proceed to choosing a Theme. Themes provide various combinations of page layout, colors, and button sets - just select the one that you like best. You can always make edits later, change your mind, or start with an "Empty Theme" to create your own Theme, if you like. You may only select one Theme at this point, but later you can use different Themes for individual folders. We've selected the default Theme "Top Tabs" with the Graphite color scheme. (Figure 5)
Figure 5 - choosing a theme

Now you'll choose the major page components - folder views toolbars, etc. - for your Web Crossing installation. As you make your choices, consider features and layout, not colors, because the colors will change to match the theme you've selected. All the settings are editable later, as well, or you can change your mind. Select one component in each of the four categories. (Figure 6)
Figure 6 - choosing page components

After a note about further customization, the next page lets you set up the Sysop email address, as shown in Figure 7.
Figure 7 - the sysop email address

The sysop (System Operator) is the the person in charge of maintaining the Web Crossing server and is in ultimate control of all the features. The address set here will be the address that people write to to ask questions and seek help when they have problems.
After you click on the Set E-mail Address button the next page will be configuration of Key Settings. The Key Settings page provides you the opportunity to set many aspects of the way Web Crossing functions during the initial installation process. If you're not sure what to do, just accept the defaults - it's easy to change any of these settings later.
Next, you'll choose your sysop password.
Figure 8 - setting the sysop password
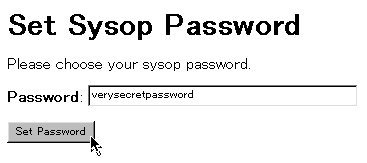
The sysop password is your most important wall of security against unauthorized access. Choose your password well! Don't choose a password that somebody can guess, like your birthday, or the name of your dog, or a hobby. The best passwords are:
In other words, "clever" passwords based on your life are not clever passwords at all.
What we usually recommend for passwords is to build it up out of three parts:
For example: book2time, sky4hire, team7food, etc. These are easy to remember, but nobody can possibly guess them, right? Anyway, choose a good password, write it down someplace secure, enter it and click on the Set Password button to continue.
|
Warning!: If you lose your sysop password you will either have to throw away your Web Crossing database and start from scratch, restore from a backup or ask Web Crossing Support for help in retrieving your password from the webx.db database. The latter alternative requires sending us your webx.db file and may incur charges for this special assistance. So - please don't lose your password! (^_^) |
Finally (!) your installation is complete and you should see the page shown in figure 9. This page illustrates the default Graphite Tabs theme.
Figure 9 - your Web Crossing server installation and setup is complete!
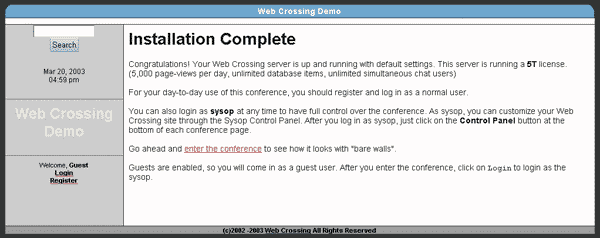
Your next step is to click on the link in your server and enter your conference.
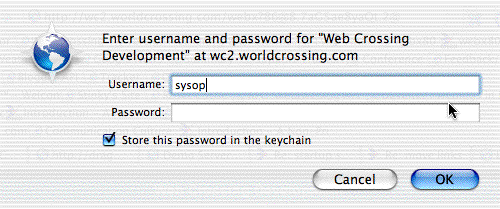
You'll be asked to log in - you can enter your sysop password or click Cancel and enter as a guest user. (see Figure 10) The exact look of this dialog box will vary from browser to browser, but it will always ask for your username and password.
Figure 10 - logging in
To go on and do some basic customization, you might want to refer to the handy Web Crossing Configuration Quick Setup Checklist section next. Good luck, and have fun!
I am seeing broken images instead of the login button. What should I do?
I am using Mac OS 9 or Windows and I already have an images folder in my web server's root directory. If I put Web Crossing's Images folder in the same directory I either have to overwrite my images directory or merge the two, because both directories have the same name (folder names are not case sensitive in either Mac OS or Windows). What should I do?
I didn't set up my Images Directory correctly and now I can't see any buttons at all. How can I get into the Sysop Control Panel to change my Images Directory location?
Refer to the documentation included with your installer for the latest release information.
Sysop docs:
Web Crossing FAQ: